

mongoDB 명령어
db: 현재 사용 중인 데이터베이스 확인
-test :Default로 들어가 있는 test 테이블
show dbs : DB의 리스트 확인
show collections : collection 리스트 확인, collection = table in mongoDB
show tables : 위 명령어와 같음
db.stats() : 데이터베이스 상태 확인
db.(db명).drop(): 안에 있는 데이터 삭제
mongod --version => mongodb 확인
mongo -version => shell 확인
use 테이블 명: 테이블 생성
db.dropDatabase() : 접속된 테이블 삭제 -테이블 확인 필요!!
db.createCollection(“테이블 명”): 테이블 생성
db.테이블 명.drop(): 테이블 지움
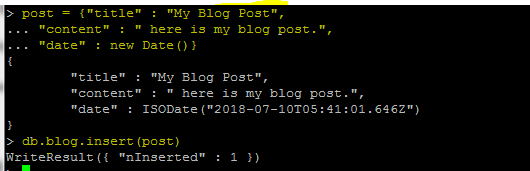
db.blog[테이블 명].insert({“name ” : “ nodejs”}) : 내용(Document)을 추가
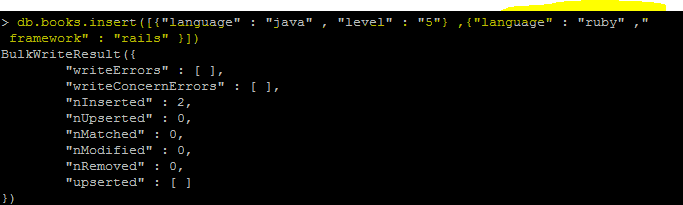
db.테이블 명.insert([ {“ ” : “ ”},{“ ” : “ ”}]);
-여러 Documents를 하나의 테이블에 넣는 방법


insert 문
연산자
몽고디비 비교 연산자
$eq 2. $gt 3. $gte 4. $lt 5. $lte
ne : 주어진 값과 일치 하지 않는 값
in: 주어진 배열 안에 속하는 값
nin: 주어진 배열 안에 속하지 않는 값
몽고디비 논리연산자

2.$and:주어진 모든 조건이 true일 때 true
=And 연산자만 , 로 조건을 나열해서 검색 가능
find 문
=db. 테이블 명.find({조건 } , {출력할 column })
첫번째 {}: where 조건
두번째 {}:매개변수
ID 없이 출력하는 조건식
ID없이 title과 likes 컬럼을 출력하는 조건식
join
db: 현재 사용 중인 데이터베이스 확인
-test :Default로 들어가 있는 test 테이블
show dbs : DB의 리스트 확인
show collections : collection 리스트 확인, collection = table in mongoDB
show tables : 위 명령어와 같음
db.stats() : 데이터베이스 상태 확인
db.(db명).drop(): 안에 있는 데이터 삭제
mongod --version => mongodb 확인
mongo -version => shell 확인
use 테이블 명: 테이블 생성
db.dropDatabase() : 접속된 테이블 삭제 -테이블 확인 필요!!
db.createCollection(“테이블 명”): 테이블 생성
db.테이블 명.drop(): 테이블 지움
db.blog[테이블 명].insert({“name ” : “ nodejs”}) : 내용(Document)을 추가
-여러 Documents를 하나의 테이블에 넣는 방법
db.blog[테이블 명].find() : 내용 확인
db.테이블 명.find().pretty() : 보기 좋게 검색
id : primary key를 자동으로 부여해줌
db.테이블 명.remove({“name” : “book01”}) : 특정한 Documents를 지우는 법
insert 문


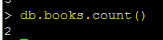
count 문
연산자
$eq 2. $gt 3. $gte 4. $lt 5. $lte
ne : 주어진 값과 일치 하지 않는 값
in: 주어진 배열 안에 속하는 값

nin: 주어진 배열 안에 속하지 않는 값
1.$or: 주어진 조건 중 하나라도 true일 때 true
2.$and:주어진 모든 조건이 true일 때 true
=And 연산자만 , 로 조건을 나열해서 검색 가능


3.$not:주어진 조건이 false일 때 true
4.$nor:주어진 모든 조건이 false일 때 true
=db. 테이블 명.find({조건 } , {출력할 column })
첫번째 {}: where 조건
두번째 {}:매개변수


=embedded documents
$slice
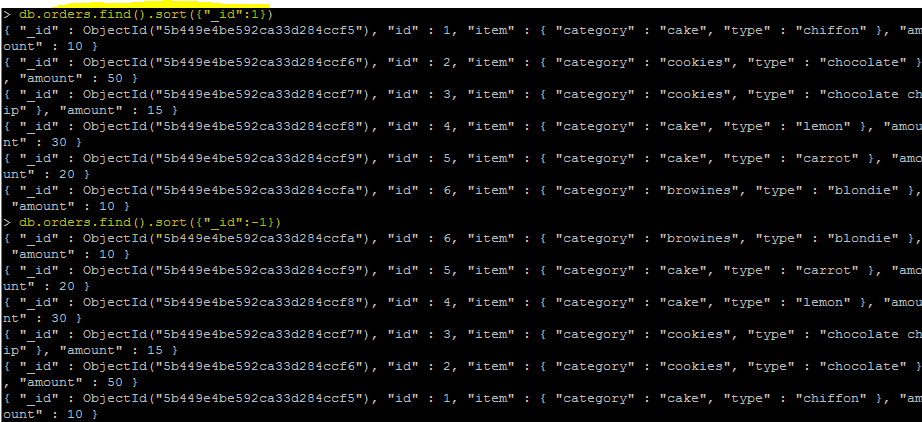
Sort
=sort({key : value})
key : 정렬할 컬럼이름
value : 1,-1
sort 조건 두개 이상
amount를 정렬하고 그 다음 중복된 값[amount:10 ]에 대해서 id값 내림차순정렬
limit

=sort({key : value})
key : 정렬할 컬럼이름
value : 1,-1
sort 조건 두개 이상
amount를 정렬하고 그 다음 중복된 값[amount:10 ]에 대해서 id값 내림차순정렬

limit
=limit을 걸어 3개만 출력
skip
=find()에서 찾아온 값을 skip을 통해 제외하고 나머지를 검색
몽고DB에서 shell은 몽고DB 명령어뿐만 아니라 자바스크립트 코드도 실행 가능
-자바스크립트
var showpage = function(page=3){
return db.orders.find().sort({“id”: -1 }).skip((page-1)*2).limit(2); }
-함수 실행
showPage(3)
id 번호 1234를 제외한 5,6번이 나옴
update : set, unset , upsert , 조건 변경
set
=컬럼 값 변경
unset
=컬럼 값을 제거 {score : 1} 1은 true의 의미
upsert
=조건이 없으면 컬럼을 새로 추가 또는 조건이 있으면 컬럼내용 변경
mongoDB와 자바연동
http://mongodb.github.io/mongo-java-driver/
1)Eclipse에 mongo. jar 라이브러리 추가
3)


=find()에서 찾아온 값을 skip을 통해 제외하고 나머지를 검색
몽고DB에서 shell은 몽고DB 명령어뿐만 아니라 자바스크립트 코드도 실행 가능
-자바스크립트
var showpage = function(page=3){
return db.orders.find().sort({“id”: -1 }).skip((page-1)*2).limit(2); }
-함수 실행
showPage(3)
id 번호 1234를 제외한 5,6번이 나옴


set
=컬럼 값 변경

=컬럼 값을 제거 {score : 1} 1은 true의 의미

=조건이 없으면 컬럼을 새로 추가 또는 조건이 있으면 컬럼내용 변경

age 20 보다 작거나 같은 조건에 score를 변경
{age:{lte:20}} = 조건 절

mongoDB와 자바연동
http://mongodb.github.io/mongo-java-driver/
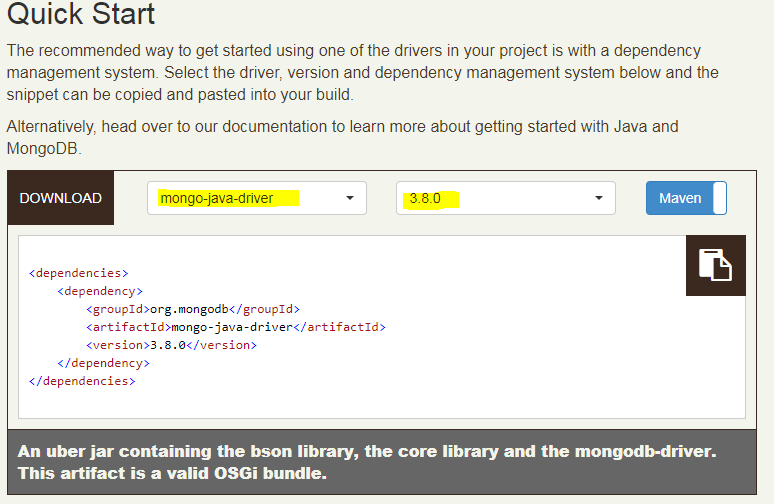

1)Eclipse에 mongo. jar 라이브러리 추가

2)
3)
댓글
댓글 쓰기